![]()

| Overview | Features | Donate | Download |
|
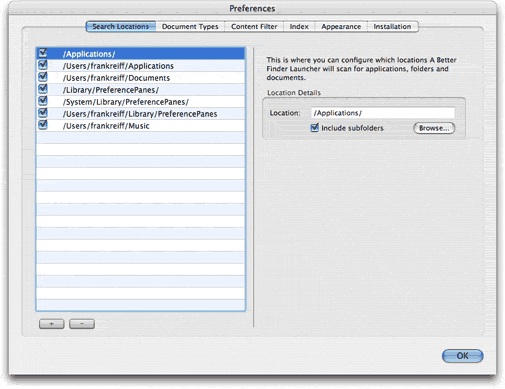
Understanding & Customizing the Index A Better Finder Launcher achieves its instantaneous query results by building its own index of your hard disks contents. By default only the following search locations are indexed:
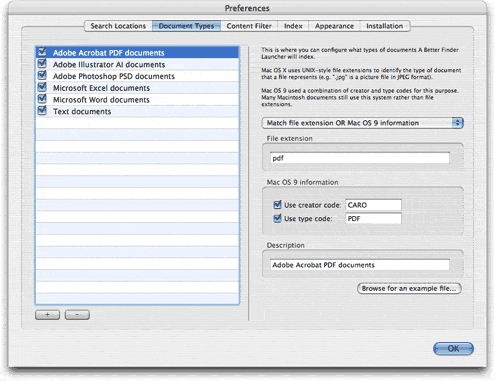
By default only the following document types are index:
Only files that are of one of these document types and in one of these search locations will appear in your query results. You can add your own search locations and document types in the "Preferences" dialog. Go to the "A Better Finder Launcher 2" menu and select "Preferences...". The "Search Locations" tab allows you to add new locations and manage existing ones.
Activate or deactivate search locations using the checkbox on the left hand side. Edit a search location by selecting it in the list and pressing the "Browse..." button to change the folder to be scanned or activate the indexing of subfolders using the "Include subfolders" checkbox. Add a new location by clicking on the "+" button and editing the new location. Delete a location by selecting it and pressing the "-" button. The "Document Types" tab allows you to choose which documents should be included in the index.
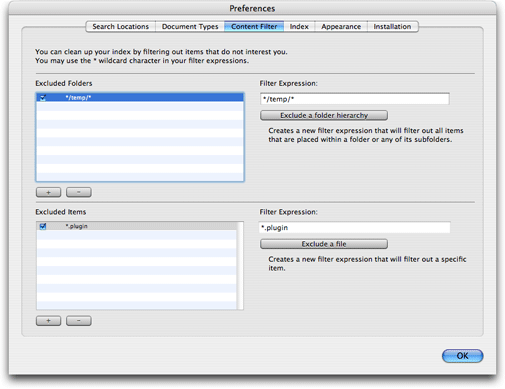
Activate or deactivate a document type using the checkbox on the left hand side of the list. Edit an existing document type by selecting it in the list. You can choose to identify the document types you wish to include by using a combination of Unix-style file extensions (e.g. .gif) and Mac OS 9-type creator and type attributes. You can use the "Browse for an example file..." button to include the document type of a particular sample file on your hard disk. All files of this type will then be included in the index. Use the "Description" field to supply a meaningful name for your document type in the document type list. Add a new document type by clicking on the "+" button, delete an existing document type by clicking on the "-" button. You can also explicitly exclude certain search locations and document types using the features in the "Content Filter" tab.
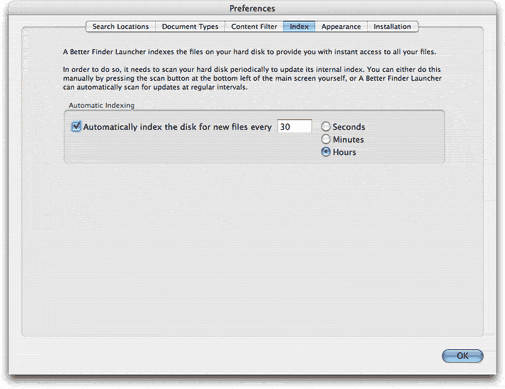
The dialog allows you to exclude folders or items. Use the "+" and "-" buttons to add or filter expressions. You can supply exact locations, e.g. "/Applications/Utilities/Misc" or you can use wildcards in the filter expressions. For your convenience the "Exclude a folder hierarchy" and "Exclude a file" buttons provide a quick way to exclude particular files or folder hierachies from the index. All these settings will only be applied the next time your index is updated. The controls in the "Index" tab allow you to decide when your hard disk is scanned and your index is rebuild.
You can choose to rebuild your index automatically at pre-defined intervals by checking the "Automatically index the disk for new files" check box. A Better Finder Launcher 2 will then automatically index your files at the pre-defined interval. You may notice increased disk activity at these intervals. This is normal, the program is rescanning your search locations. You may also trigger a manual index rebuild by clicking on the small circular button at the bottom left of the main window or by selecting the "Start Index Update" (Command-U) item in the "Index" menu. |
Freeware for Mac OS X 10.3/4 Not fully Mac OS X 10.5 Leopard compatible! Not Mac OS X 10.6 Snow Leopard compatible! 2nd July 2007 Version 2.2 is now freeware, can be run as a normal application or hot-key only tool, is now more responsive and fixes all known bugs. The manual covers installation, use and configuration. Check out the answers to these frequently asked questions.
|


